Wednesday, April 22, 2020

The West Coast life is giving me creative vibes!

Hello everyone! It's so great to be back on my blog again. I've really missed being about to chat with you all about my creative life. A lot has happened since I posted last. I'm living on the West Coast now with my husband, dog and two cats. How did that happen? Well I took an early retirement from my job, and got to purging what we didn't need in our townhouse, bought a new vehicle and drove across the country. What an amazing trip that was! I fully intend on scrapbooking some of the photos we took very soon and get to making that album.

We've been here now for a little less than four years, and it's been the best move possible for us. It brought us closer to both our parents. My mother moved out here about 3 years before we did. And of course, my husband Paul was missing the Pacific Northwest life and his parents. I'm so thrilled that we finally got to move here for his sake. I know that he missed his family dearly, and until I took my retirement, we really had no plans to move out here due to our finances and being stuck in the day-to-day.

What have this move and these four years taught me? Hold onto your dreams. Heck, have a dream! I realized that in terms of where I wanted our family to be in the near future, five years, ten years down the road...I didn't have any clue! Now if I had given it some serious thought after we got married, and we sat down to discuss our family plans, we probably would have been out here much sooner. That in itself has taught me that you need to take time to actually dream. Don't just daydream when it's convenient, but actually make time to dream, and work toward that dream. It's also taught me that no dream is too big. Honestly. I would never have thought that we could make a move almost five thousand kilometres away.

So now I dream a little more. I still have to try and make time for it. And I have to silence my inner critic who thinks it's silly to dream. We all have one, right? Now to set those dreams into motion, I have to set some goals. Ugh. I really hate that word. It sounds like work. But goals aren't work. Not really. They are just this abstract thing you want to accomplish, but they themselves don't mean any work. What did someone say about goals and plans? That if you don't create a plan, with tasks (work), then it's just a dream? That is not going to be my life any more. I am going to give myself work, even if it's difficult, to reach for my dream.

Here I am again, on my blog, starting on the plan. I'm back sharing some of my latest scrapbook layouts, perhaps some art journal pages, and more creative works. What's my dream? Honestly, I'm still working on nailing it down. Right now it's a lot like a feeling, a yearning. I know that it feels right when I get back to creating. So for now I'm going to say that I'm dreaming about being more free to create.

I've ventured into different ways to explore that creativity, including a new YouTube channel. And the videos will be primarily scrapbook and art journal process videos. But I'll be back here regularly posting updates on my creative life, twists and turns it might take, and give my creativity another voice by sharing it with you.

I'd love to hear your opinion on my latest videos as I get started out on YouTube, and would love it if you'd subscribe or share them. Thanks for sticking around and I look forward to your comments.

I'll see you again soon with a creative update. In the meantime, stay safe and healthy (look for a blog post on the current pandemic soon)!


Wednesday, April 06, 2016

Blustery Spring Printable Planner Stickers

It's April and you know how the saying goes....April showers bring May flowers. But not in Ottawa. It's snowing. In fact it's more than snowing; it's a blizzard out there. It's pretty typical to get a late March snow storm but I think this is the first storm in April that I remember when the snow actually stayed and accumulated on the ground, again.

So needless to say April hasn't been off to a great start, which is why I've designed these new printable stickers yesterday for The Happy Planner. Blustery Spring hints at the rains, the winds and eventually, the pretty flowers that it brings.


Like it? Check it out in my Etsy store and get your planner looking a little more Spring-like.

Saturday, March 26, 2016

Happy Planner Stickers help keep me organized

It's been a busy time for me, very busy. Lately I've been on a planning kick. I wanted to start organizing my life, and getting into a routine, keeping track of my exercise, days I work, doctor's appointments and more. Last year I bought an Erin Condren Life Planner and I loved it. It was easy to use, and fun to decorate. But I really didn't like how it was divided into Morning, Afternoon and Evening, especially when my life just isn't organized that way. I needed more flexibility.

Enter planner decorating. After investigating and joining a few Facebook planner groups I discovered this world of decorating your planner using stickers! What a fantastic concept! I could now update my Erin Condren and cover over the headers I didn't like. And the added bonus was that I was documenting my life in a pretty way, almost like merging my planner with a scrapbook. 

After a while, Me & My Big Ideas launched their new Happy Planner and I fell in love. The layout was very similar to the Erin Condren, but without the titles on the headers. But what drew me in was the discbound system. Instead of having to buy clips or fold extra papers into envelopes in the back, with The Happy Planner, I could punch my papers and put them right into the week I needed them. I already had a punch from Levenger that worked with discbound systems, and it worked for my Happy Planner too.

I started out decorating my THP with free stickers which I found on a number of great sites. All I needed to do was print onto sticker paper, or the more economical full sheet label paper, and cut out what I wanted. In some cases, I could download a Studio file for the Silhouette Cameo and cut them out that way. The community was very generous. But I still couldn't find exactly what I was looking for, so I decided to make my own, and people liked them. So because I already had an Etsy shop and had uploaded some of my older digital scrapbook design kits, I decided to launch a new section, the Printable Stickers. The one thing I think that sets mine apart is the fact that I have a sticker for each day of the week to track my sleep, mood and pain. I found a lot of people looking for that, so it's pretty much a staple on my sticker sheets, with few exceptions. Here are a few examples of what I've done.


It's been a lot of fun making these using some of my older digital scrapbooking kits that I've designed. Now I'm using my Happy Planner more often, especially organizing things like our upcoming move to the West Coast, it's been easier to get organized, and keep on track of things. I hope you enjoy these. I'll be dropping some freebies here in the future as well from time to time. And if you have suggestions or requests for particular stickers, please leave a comment and I'll get to them bit by bit.

Have an amazing weekend everyone!

Thursday, April 02, 2015

My Daily Docket

Hi everyone! Is Spring finally here? I don't know for sure, but I definitely have cabin fever. So I've been creating things that I can really use - like my own daily docket faux-dori insert.

I couldn't find anything that really suited my own needs. I wanted to have a place to sketch or mark down things that were inspiring, write my goals for the day, my gratitude journal, my spiritual goals and more. Tough list I know.

So I got to creating one myself, and I have to say I really like it.


If you like it, I have it as a digital download in my Etsy store for a very reasonable price.

If you have any ideas for a daily docket of your own and would like me to try making you something, drop me a line!

Have a great week!

Sunday, March 01, 2015

My own Fauxdori - a new obsession

I have a new obsession. Planners. Recently I bought an Erin Condren planner to help me with my business and myriad of appointments. I love it. It's pretty, but I find it too big to carry with me every day. 

Then I saw a friend of mine post her fauxdori on Facebook and I had to know what it was. What followed was a plethora of Google searches on Midori Traveller's Notebooks, and their DIY versions, along with insert. I found that I could have a planner, a journal, a sketchbook and more all in one lovely purse-sized notebook.

So I did some research on YouTube and other areas, and found Ray Blake, and decided to use his method for making a cover. Instead of leather, I decided to go with some denim that I glued to scrapbook paper for reinforcing. I sprayed it with sprays and painted some feathers through stencils too. I used several  different embellishments that I had laying around, namely Tim Holtz charms, clips and chain, some washi tape, a Simple Stories Snap Album insert, some metallic elastic, and journal cards.

I made my own inserts for my bullet journal using Ray Blake's inserts that he has generously put on his blog for download, and went to town making my own fauxdori.

I made a pen loop from duct tape and a brad, and it holds my pen quite nicely.


I love how thick and juicy it is without being cumbersome. And the discovery of a bullet journal works for me! So easy to keep notes, lists, and a brain dump all in one spot.

Hope you like the project and I've listed links below to the places where I found my inspiration and downloads.

Inserts:
Ray's insert downloads
Plastic pocket inserts

Cover:
Ray Blake's DIY notebook cover which inspired my cover

Other great resources for your own notebook on YouTube:
Rhomany's Rhealm
Jennifer Harvey


Saturday, February 28, 2015

I love GRUNGE journal cover

Hi everyone! I shared my recent project on the Gauche Alchemy blog. Did you catch it there? No?? Here it is! 
Kiki here with my first project for Gauche Alchemy. As you’ll soon find out, I love grungy texture. No, scrap that. I have an OBSESSION with texture. I cannot seem to create without it, and look at the project and say I’m done. The more texture the better. And the more unusual the texture, the more fun it is to play with it.
This month for the February Challenge, I put a lot of different textures into the project. I love grunge. Love isn’t always pretty, soft and lacey. Sometimes it’s messy, chaotic and dirty! LOL
Want to see what I mean?

Art Journal Cover by Kiki Halbert
There’s so much texture in there I get giddy. I used gesso and drywall tape, inked up canvas, washi tape, paper scraps, cardboard, wood, cork, thread….ahhhhhh.
Art Journal Cover by Kiki Halbert
So what did you get out of the monthly challenge inspiration? I’d love to see your projects so make sure to play along, and please link me up to them so that I can go and leave you some love!

Wednesday, December 31, 2014

Quick peek inside my altered book!

I absolutely loved getting into the textures and sprays today. I hope you enjoy!


Monday, December 22, 2014

A delightful return

I love days like this - where the sky is grey and looks so cold but I set out to do something creative and productive. I dug out my art journal supplies and loaded them into a box I had and brought them downstairs to the kitchen table. Then I started on a page with splatters and streaks of colour.

It felt so good to dive into the stencils and textures, and get my fingers into gesso, and sprays. And so the name of the page - Return. In hindsight, I did notice a little something on the page that might be an alternate title. See if you see it as well.


Did you notice the title that popped off the page? Return Ticket. I thought that was kind of fun. I had no intention of that going together but they did.

This page really is like a return to art journaling for me. A return to my roots of journaling with textures, sprays, stencils, inked canvas and cardboard. I definitely live for the grunge when it comes to journaling.

I hope you enjoyed looking at this and get to journaling too sometime this week. It's a great way to clear your head after a week of craziness.

Thursday, November 06, 2014

Some weekend fun with friends!


I recently went to a fundraising crop just outside of the city with friends whose company I adore. It was a very productive day for me. I made some mixed media bookmarks and a total of 5 layouts. Of course I brought my favourite Lindy's Stamp Gang sprays with me, including a couple of the sprays from the November challenge, Sweet Violet Purple Teal and A Bit o'Bubbly, and some Red Hot Poker Orange. I did add a few splashes of orange and teal as well to most of my projects. Take a look!


I spray my wood veneers with Lindy's sprays. Love the effect!

One of my favourites ever! Not sure if I can give this one away!

Yes, you do!

I love the combination of the purple with teal and some dashes of dark colour.

I painted the burgundy flower with Lindy's sprays to get it to match Natalie's coat. 

I struggled with the design a bit, but I love how it turned out!

One of the last photos of my grandparents that I have. Love this layout.

This is such a fun kit - Ahoy There by Carta Bella, that you can order from Tina's Scrapbooking

Another maritime layout, but this is a work in progress. Still want to embellish it!
I hope you enjoyed these! Have a productive weekend!

Monday, September 29, 2014

Latest projects


Seems like it's been a while since I've posted anything that I've been working on here on my blog. Time to catch up. These are just a few of the projects I worked on recently this past weekend.


I have to say, I still love Prima for my mixed media layouts. Hope you enjoyed these and if you have any questions about the projects, just comment below! Have a great week!

Thursday, August 21, 2014

Mixed media bookmark fun

Up until last night we finally got some glorious sunshine and warmth again and it completely lifted my spirits. I decided to get into my craftroom, open the roman blind, and let the sun pour in to inspire me. 

I've been a collector of paint chips from just about anywhere I can get them, from the time I started doing art journaling. Not only do I love the colours, but they make an excellent journal strip if you need something colourful and practical at the same time. But a couple of days ago, I decided on another use for them....mixed media bookmarks.

Whenever I go to Chapters with my husband, I'm always looking for unique bookmarks and I came up short last week when I went to get one. So it was time to make my own, I figured. I created one using a pink chip, some Prima paper scraps I had that I love, and some canvas and Prima embellishments and stamps. I adored how it turned out, so I made three others to give away to friends.


If you want to make your own, I would highly recommend that you reinforce them with some strong scrapbook paper glued to the back. That way you know the bookmark will last for a long time without becoming ratty and torn (unless of course you like that look).

I hope you are inspired by this and have fun with your scraps to create something similar. I'm going to make many more of these in the near future because they make me happy.

Have a great week!

Saturday, August 16, 2014

Strong silent type

I really felt the need to do a layout that's about my hubby's strong silent moods sometimes. He makes me laugh a lot but lately I've been needing his strength, and he's given it to me in spades.

I used lots of Prima flowers and embellishments from the Engraver line.


Who says you can't have flowers on a masculine layout? :) The final touch was using the Lump of Coal by Lindy Stamp Gang. It's a black pigment with gold glitter.

Hope you enjoyed this, and have a great weekend!

Sunday, August 03, 2014

We are family


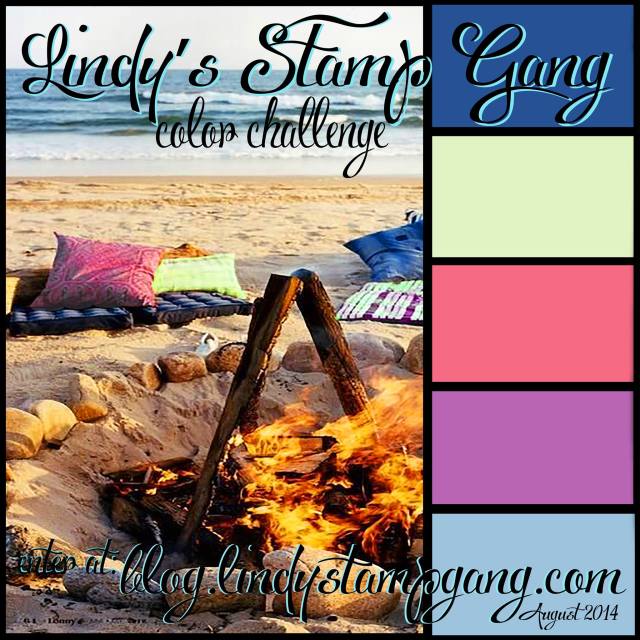
Hi everyone. I thought I'd show you my layout today that I created for the Creative Embellishments August Challenge, and Lindy Stamp Gang's August Colour Challenge. They really went hand in hand when I sat down to create. Everyone knows I love my Lindys so I pulled out the Hydrangea Blue, Sweet Violet Purple Teal and Whale Watch Blue to create my background and colour the frame and chipboard from Creative Embellishments. The inspiration I used from their challenge was the circle theme, dots and music. So I used bubble wrap to create the background and used flair and gems to really pull the theme together.

Here's the inspiration photo:


And here's the Lindy Stamp Gang Challenge photo:


My husband said he liked this layout so much, he wants me to frame it. I love it when he says that. You can click on the photos to see more detail.


I used lots of Prima flowers and embellishments that I had in my stash, which are always fun to use.
And now for some fun closeups.


You should play along too! It's so much fun to find inspiration that pushes me to use my stash instead of just using kits. I'd love to hear what you think of this layout. Feel free to leave me comments. 

Have a great Sunday!